Your Complete Guide to Romanian Deadlifts
by Jaime Barroso
So you want to get your form right on Romanian Deadlifts (RDLs), correct? You’ve come to the right place.
Chances are you already know that deadlifts are an amazing full-body exercise, that they are great glute and hamstring builders, and good for developing lower-back strength when done correctly…I mean, that’s why you’re here, because you’re already convinced.
So, let’s jump right in!
I love RDLs - I find that they are the easiest deadlift variation to start my beginner virtual training clients with, because it gives them the opportunity to master the hip hinge, feel the glute and hamstring involvement, focus on the lack of knee involvement in a deadlift (so many want to squat right away, and starting from the bottom, with a conventional deadlift, often makes it more difficult to re-train this population), and do so with a smaller weight without feeling too intimidated.
I also love them because they are amazing for intermediate and advanced clients as well. I never write a program, for myself or anyone else, without including Romanian Deadlifts. There’s no limit to this deadlift variation!


***Don’t settle for anything less then solid form in any deadlift variation.***
Here’s an example of my client Julie* performing Dumbbell Romanian Deadlifts at home (this is how I assess form and provide feedback to my virtual training clients). You can see that her form massively improved based on the visual feedback I gave her.
I guided her to sit her hips down a bit while keeping that neutral spine. Now that she’s got that, I want her to adjust her gaze (which will help keep her spine aligned through the neck) as well as work on her pressure points through the foot to keep her balanced and stable. Moving forward, as she increases weight, we will likely focus on lat engagement, mind-muscle connection and proper pelvic tilt at lock-out.

Red line indicates her current angles. Green line indicates where I want her angles to be.
*name changed for privacy

Green line indicates a much improved hinge! To-Work-Ons from this point forward is her gaze/spine alignment throughout, as well as her foot placement/pressure points, which I communicated via voice memo.
Now before we dive in, keep this important point in mind:
Romanian Deadlifts are mainly a glute and hamstring exercise - lower-back involvement is secondary. In order to get your RDLs to utilize more glutes and hamstrings and less lower back, you will need to consciously remember this whenever you lift, so that you can connect your mind to those muscles (the mind-muscle connection) while you are lifting. This will ensure maximal glute/hamstring growth and strength and minimize or eliminate lower back pain or stress.
Set-Up for Romanian Deadlifts
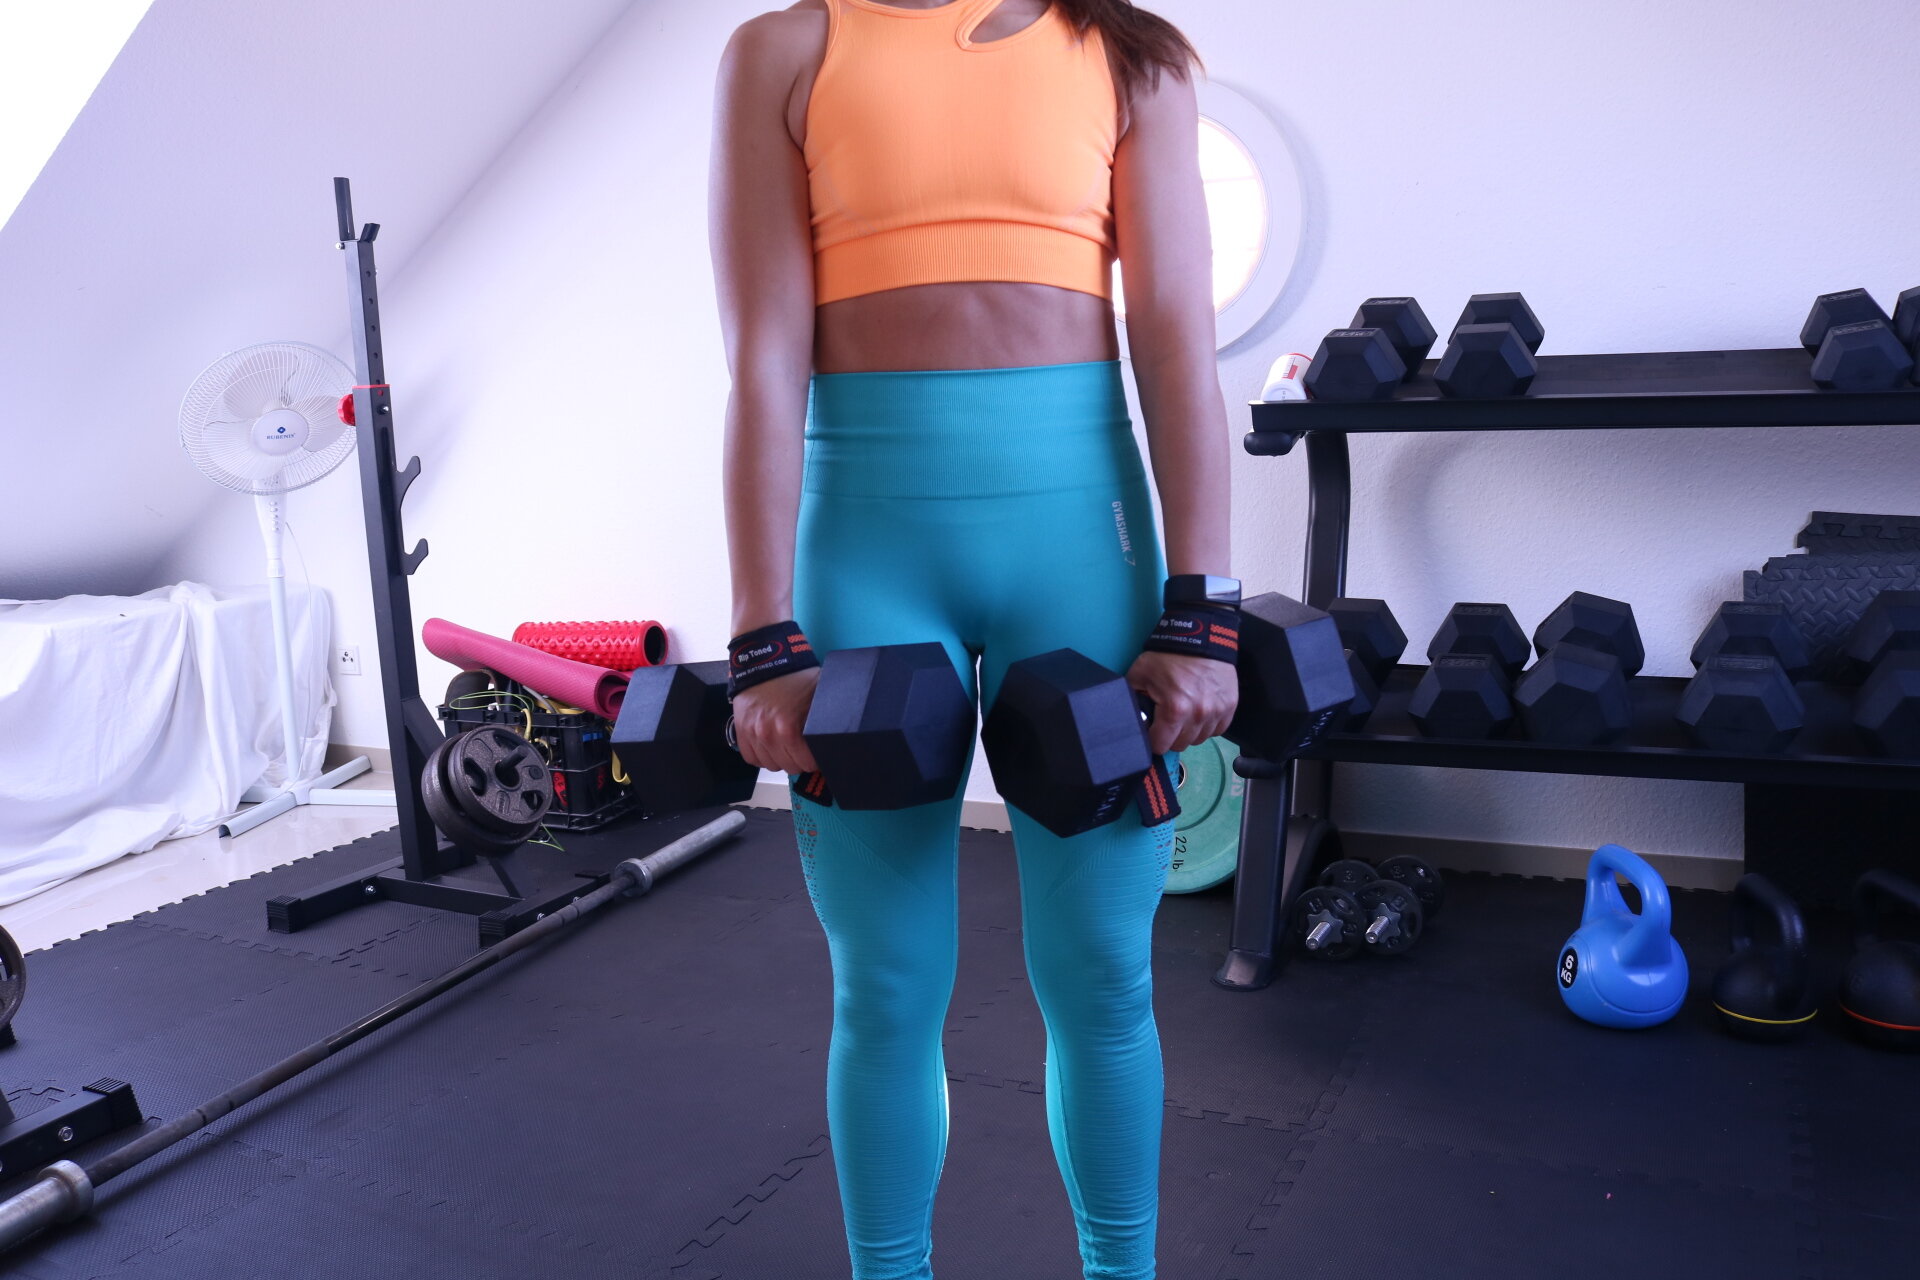
Dumbbells:
Choose a Weight: If you are just starting out, I recommend starting with 10s or 15s. Starting too light might make it harder to “feel” some of the cues listed below. If this doesn’t apply to you, then make sure you solidify your form before going too heavy. In general, you want to chose a weight that you can do for 8-12 reps and around a 7-8 on the scale of Rate of Perceived Exertion (RPE).
Grabbing the Dumbbells: Remember to always grab and set down weight safely! Sometimes, when grabbing weight or releasing weight to the floor, we forget every single cue and form lesson we have learned and let our whole bodies relax. This is a recipe for injury! When picking up your dumbbells, always get very close to them, and squat down. If you can, position your dumbbells next to each other parallel, and squat in between them to pick them up. Placing the dumbbells individually on an elevated surface, such as a bench or the dumbbell rack, and grabbing them from there is also a good option.
Brace for the lift: At this point, you are standing with the dumbbells and ready to begin!
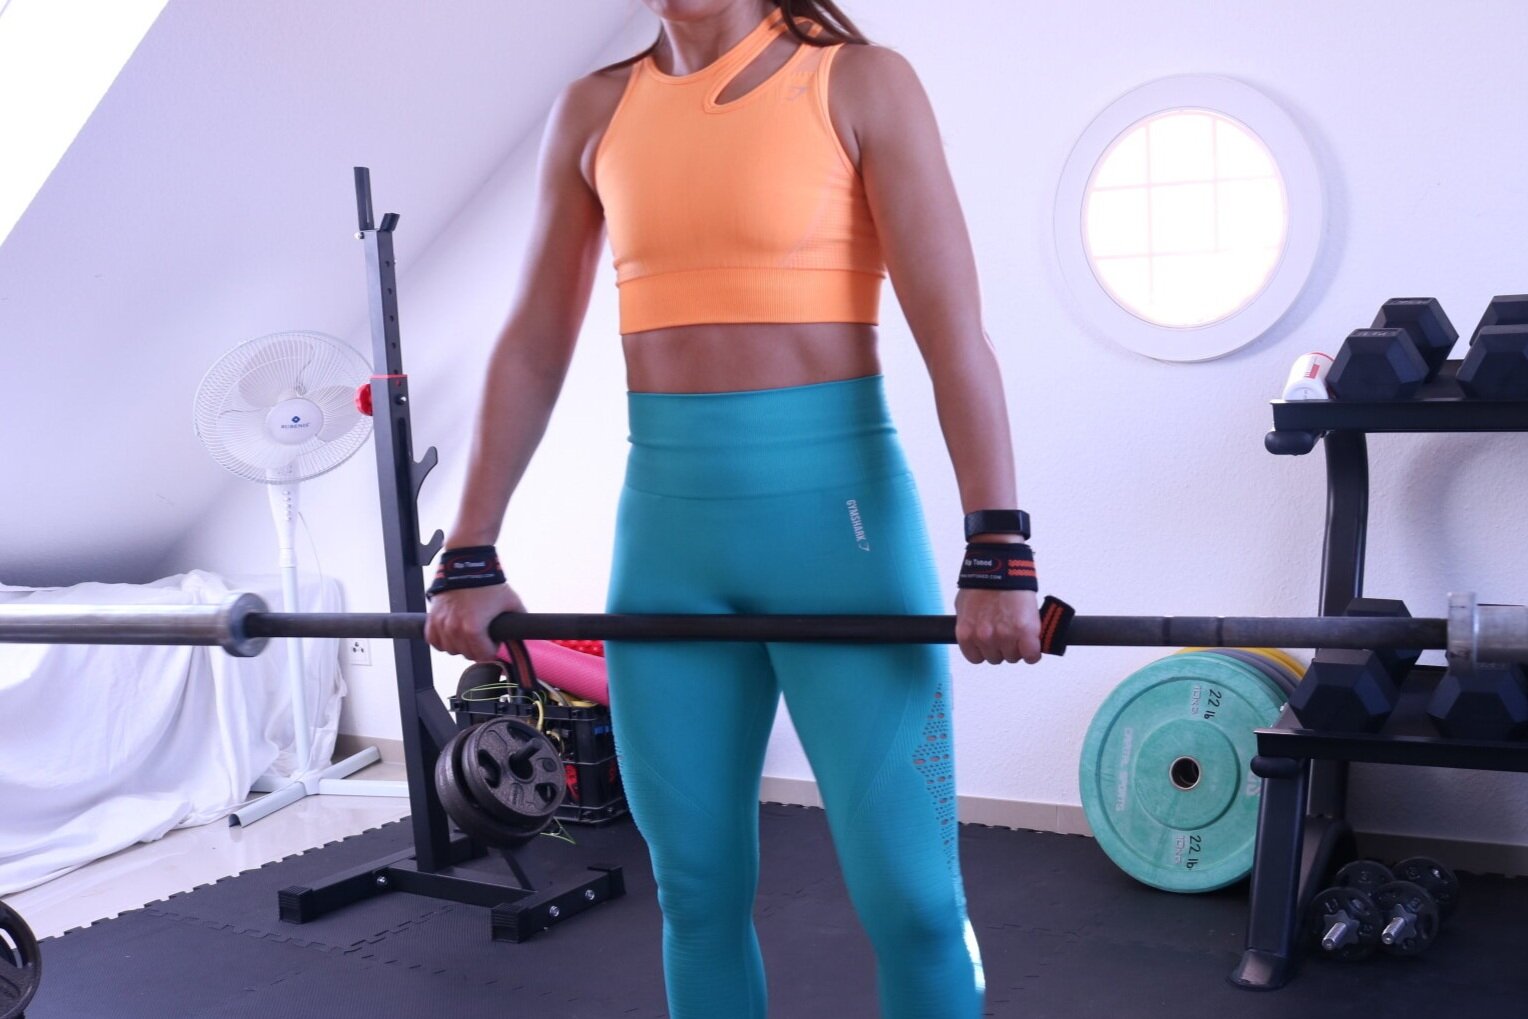
Barbell:
Set-up the Bar: The best way to set up for a Barbell Romanian Deadlift is to use the hooks or safeties on a squat rack/cage. However you could also load the plates from the floor.
Load up the plates: When the bar is elevated this part is easy; on the floor is slightly more challenging but totally doable. If you don’t have rubber bumper plates, no worries. You can easily use smaller iron plates for these since the goal is not to touch the floor. You could also use one of the preloaded curl bars if your gym has them. Keep in mind, the Olympic barbells weigh 45 lbs, so make sure you start with a total weight you feel comfortable with, even if it’s just the bar.
Grab the bar: Remember to always grab and set down weight safely! If you are starting from the floor, you’ll want to stand with the bar over the knot of your shoelaces, squat down and grab the bar, brace your core and leg-press it into starting position.
For grip, I prefer a mixed grip for all barbell deadlifts, as I feel way more in control of the bar this way. A mixed grip is one hand supinated (underhand) and one hand pronated (overhand). As you increase info on straps below).
Brace for the lift: At this point, you are standing with the bar and ready to begin!

Mixed grip, bar over shoelaces, hips dropped and knees forward enough so that shins touch the bar.

Lifting the bar from the ground in a conventional deadlift style, view from the side.

Starting position for the barbell RDL.
Time to Lift!
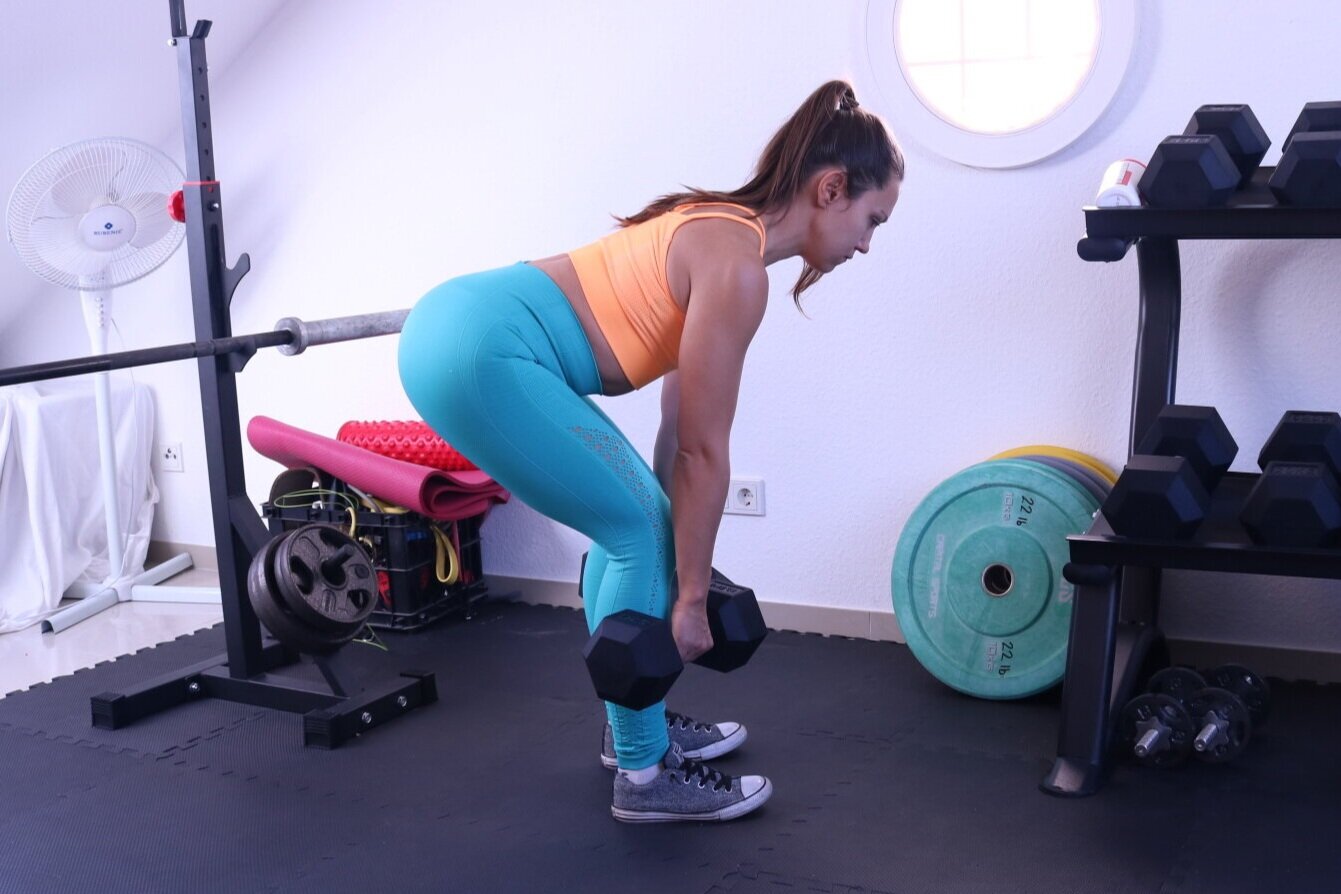
Your feet should be slightly closer than shoulder width apart, firmly planted into the ground, toes pointing forward. Keeping the bar - or your thumbs if you are using dumbbells - touching your legs the entire time, shove your hips back, bend at the knee and lower the bar to just below your knee or to mid-shin.
Cues for this:
Brace for the lift by taking a deep breath into your belly, expanding your core like a shaken soda can, and then holding it while tightening your core like someone’s about to punch you in the gut.
Keeping the weight close to your legs requires lat engagement - imagine holding a tennis ball in your armpits. If you let your arms hang forward, the tennis ball will fall out.
Don’t think too much about your shoulders. If your lats are tight, your shoulders will be exactly where you need them to be. Do NOT pull them back.
Imagine that your arms are chains holding the weight - this will keep you from pulling with your arms and bending the elbows.
As you lower, imagine you are trying to close the car door behind you with your butt. You will bend at the knee, but your knees will not come forward - you will have a vertical shin the entire time.
Keep a neutral spine by gazing at a spot on the floor about 5 feet in front of you (as well as keeping those shoulders down and your core tight).
As you reach the bottom, allow your weight to shift back into your heels - this will help maintain your center of gravity and ensure you don’t lean forward. Your toes will still be touching the ground, but you should feel the main pressure of weight in your heel. As you rise up, allow your weight/pressure point to shift back to mid-foot.

Correct Form: Shoulders stable, lats engaged, tight core, neutral spine, vertical shins, butt shoved back

Exaggerated and INCORRECT Form: Relaxed shoulders, bar too far, straight legs, loose core, rounded spine
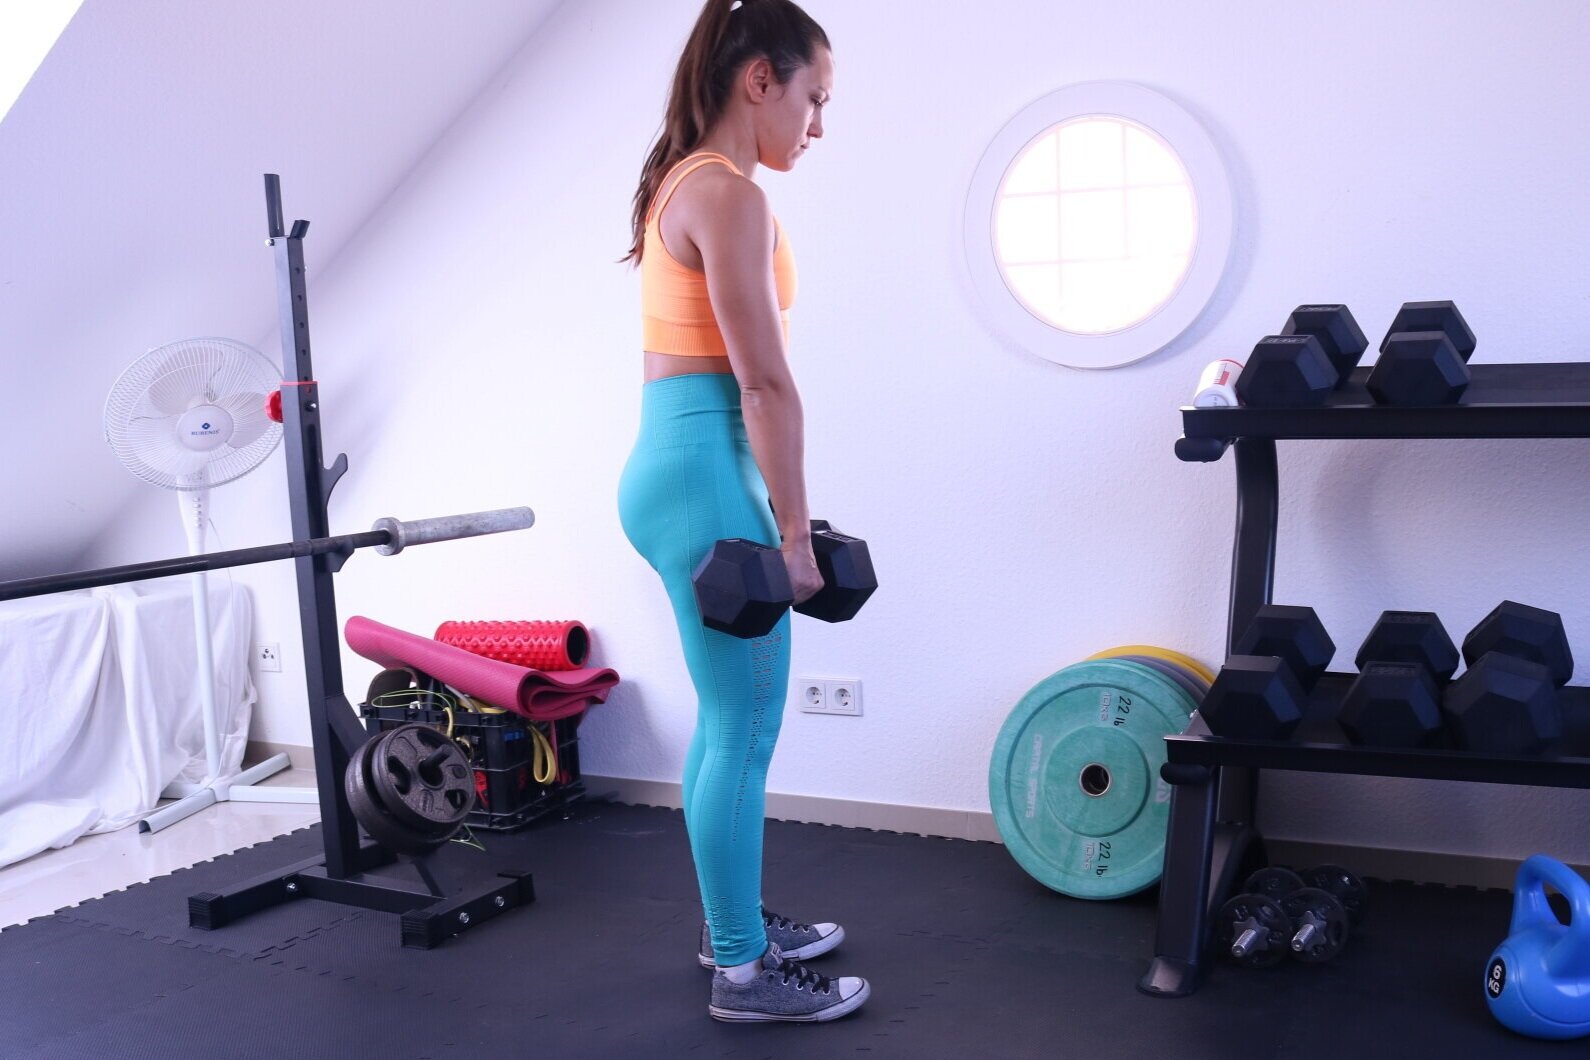
Once you feel a tight pull in your hamstrings and you’ve reached below your knee, again keeping the bar - or your thumbs if you are using dumbbells - touching your legs the entire time, shove your hips forward and stand up.
Cues for this:
Keep those lats engaged (or those tennis balls snug in your pits) and imagine you are almost trying to pull the bar/dumbbells through your legs as you stand.
Intentionally imagine squeezing your glutes, and shoving your hips forward, instead of imagining pulling the bar up. This mind-muscle connection will make sure you are utilizing more glutes/hamstrings in the lift and less lower back. It’s literally a standing hip thrust.
At the top, remember that the lock out should resemble a hip-thrust. You will have tight glutes, but don’t shove them so far forward that you overextend your lumbar spine. Release your breath as soon as you hit top position.
Keep your core tight throughout the entire range of motion. Think “ribs down” to ‘close’ your rib cage. This will help keep your pelvis tilted posteriorly, which will ensure your glutes are utilized correctly and you aren’t overloading or over-utilizing your lower back.

Correct Form: Pelvis posteriorly tilted, tight glutes, closed rib cage, tight core

INCORRECT Form: Pelvis anteriorly tilted (booty pop), over-extended lumbar spine, open rib cage, loose core
Tips for Mastery
Practice with a weight that isn’t too heavy, but also isn’t too light! I find that when my clients begin with weights that are too light (I’m thinking 5 lb dumbbells here), it’s harder to imagine certain cues, like their arms being chains and not bending their elbows. Choose a weight that feels slightly heavy hanging from your arms, but not so heavy that you are unable to complete 10 reps while remembering all your cues.
Focus on tempo, especially on the eccentric (lowering) portion of the exercise. Count 2-3 seconds down, pause for a brief moment, and come up in 1-3 seconds.
Don’t be afraid to load up this move - RDLs blast your hamstrings and glutes, so once your form is solid, go ahead and add weight until you can do a rep range of 8-10 within a Rate of Perceived Exertion (RPE) of around 7 or 8 (out of 10).
Practice, practice, PRACTICE. Never accept anything less then solid form.
For all deadlifts, barefoot is best. This allows you to really ground yourself to the floor and shift the weight to the proper position of your foot. If barefoot simply isn’t going to happen, the next best thing is a super flat shoe, like Converse or those weird toe shoes. (Yep I said it. They’re weird.)
Consider investing in some lifting straps. As the weight gets heavier, even a solid mixed-grip will start to give way on Romanian Deadlifts before your glutes, hamstrings and lower back do. When grip becomes your biggest limiting factor, lifting straps are a game-changer in being able to move more weight with RDLs!

How to attach straps to your wrists.
My grip is a little wide here, but you can see how I use the straps with a barbell and a pronated grip.
Straps are super useful when doing RDLs with dumbbells also.
Some Common Questions:
Are romanian deadlifts safe for your back?: In a word - YES. Incorporating any deadlift or hinge variation into your routine, with proper form, is going to strengthen your erector spinae (lower back) muscles, which will actually decrease your chances for injury in every day life, especially as we age.
What muscles am I working during RDLs?: The main muscles worked in a Romanian Deadlift are the glutes, hamstrings, erector spinae (lower back) muscles, mid and upper back muscles, and even traps and forearms.
Should I include RDLs on my leg days or back days?: I always program deadlift variations on lower-body days, since the main muscles worked are glutes and hamstrings. This is especially true for Romanian Deadlifts. Depending on how your program or split is designed, you could get away with performing conventional deadlifts on an upper body day, or any of the variations 1-3x per week in a full-body program.
Are there other deadlift variations?: Absolutely. This is the first in a series I am working on, covering deadlifts in their entirety. Stay tuned!
I’m uncertain about my form…what should I do?: Consider hiring a knowledgeable trainer (like myself!) to coach you, in person or virtually, to make sure you are performing exercises correctly! It is definitely worth the investment.
Did you enjoy this article? Let me know below!
Happy deadlifting!!!
Coach Jaime “The Deadlift Queen” Barroso
PS: Check out the video below for the full tutorial!